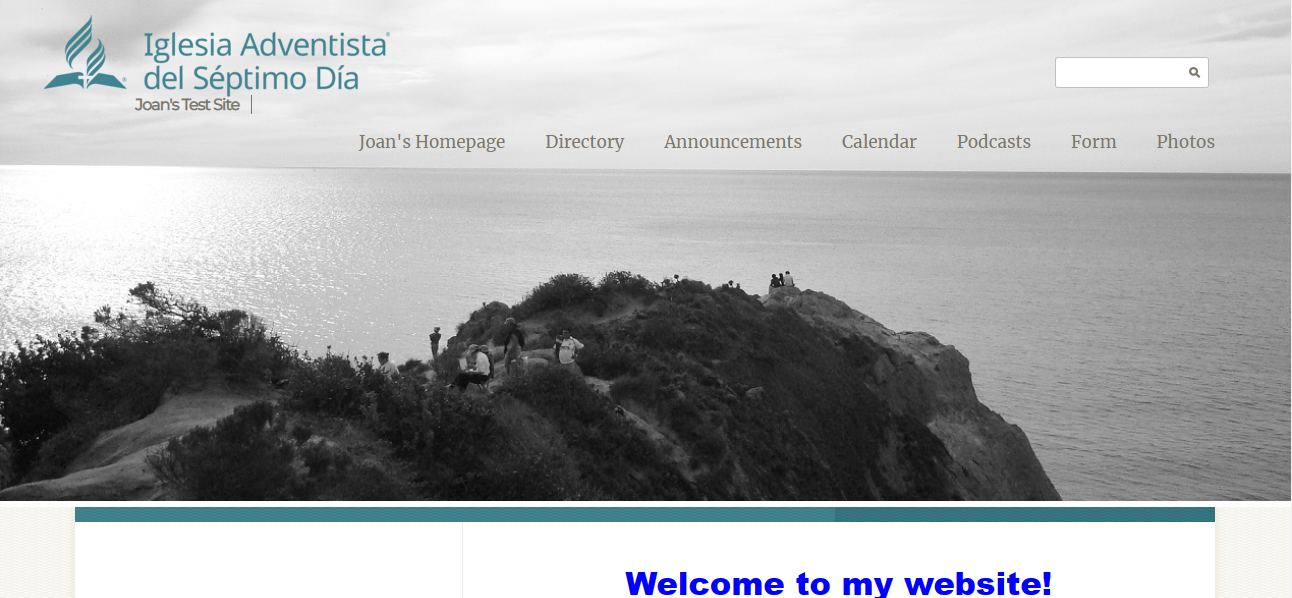
 Banner Image Widget
The Banner Image Widget can create a single banner image or have an image randomly selected to customize your netAdventist website.
- If you haven't already done so, Log in to your website and select the Dashboard link at the bottom of the page. You will be taken to the Site Content tab. If you haven't already activated the Banner Image Widget in Extensions, you will need to go to Settings and activate it. See the Extensions training video for further instructions if needed.
- Select Theme and Templates from the left navigation bar. Select the Change Theme button and look through the list of available themes. Currently the only default themes that have a banner image in them are the Blessed Hope and Adventist Corporate themes*. If you change the theme, after selecting it click on the Choose as theme button; if not, Cancel. See the Themes training video for further instructions if needed.
- Scroll down and click Edit Template next to home.
- Click on the Widgets tab. Note: The Slideshow widget shows up automatically on the Adventist Corporate themes. It can be removed by clicking the X on the right.
- Add the Banner Image Widget in the top gold widget container on the home Template. See the Widgets training video for further instructions if needed. Select the title of the Banner Image Widget that appears in blue. The Banner Image Widget edit window opens.
- Select the Add an Image link.
- The Insert a Photo window opens. Select images from your library to display in the Banner Image Container or choose to upload new ones by selecting the Upload a photo tab.
- Select the Choose Files button. This will open a browser so you can choose files from your computer. Click on the image you want to upload and select Open. Read step 2 and select the Copyright checkbox and then click Start Upload. Note: Make sure your photos are the right size for displaying in the banner image container. Images will be displayed in their original size and may be too big or the wrong proportions.
- After the upload is complete, you are taken back to the Photos in Library tab. Select the checkboxes for all the images you wish to show in your Banner Image container. If you select more than one image, a different one will be randomly selected when the page is refreshed. If you want a slideshow that rotates the images, see the Slideshow training video. Under the images choose the size you would like your photos to be and then select the Insert button.
- You can now edit your banner image settings by adding a Link, Alternative Text (Alt Text), padding and image scale. When finished select the Done button.
- Now you have successfully created your Banner Image(s). Select the Save and Return at the top or bottom of the page.
- To view the banner, select the View Site link at the top of the page.
*The themes Natural Earth, Natural Ocean, Natural Summer, Simple and Clean, and Texture have a banner image available.
Note: home_full_width_hero_header is the name of the template and layout where you can place a banner image (or a Slideshow) in the background of the title and menu using your own image. An image of 1200 x 500 pixels works or a horizontal image selecting the Stretch to fit option.This feature is only available with the theme Adventist corporate V1. See an example in the image below. See the Templates or Slideshow training videos for further instructions if needed.
